Ahoy!

Continuing the trend of blog posts that exist to document things we don’t want to forget, I present Configuring dual stack IPv6 without DHCPv6-PD.

If you’re wondering wtf than yes, this is a slightly bespoke setup that you won’t find with residential ISPs. Recently we’ve moved (the cause of all technical progress it seems) and with that I switched from Internodes business NBN to a new business centric ISP to connect our new place.

Ulterior motives

Why IPv6?

Well it is year 2020 so it would be remiss of me not to continue to tradition of being a salty “But I can’t reach you on IPv6” type user and help push the internet to a better place where I can.

But really the thing I needed most was to be able to connect to ephemeral instances in AWS EC2 without stuffing around to setup dynamic DNS. I was wanted a lazy option to SSH into. Turns out static IPv6 addresses are free 🎉 while IPv4 elastic IPs are free only while the instance is running.

Going dual stack

The ISP is configured a bit differently to residential ISPs in Australia hence this blog. The IPv4 features are nothing unsurprising, a static IPv4 session with /29 framed route.

But the IPv6 prefix, while being the typical /56 is delivered via a static interface route which is normally is handled by a managed CPE router but in my case needs to be terminated on my ER-X.

Consider my IPv6 prefix of 2001:0DB8::/56 and my interface the expected pppoe0 for this exercise.

On the pppoe0 interface I have some IPv6 configured and I get a remote peer fe80::f381:9ee4:b2f2:89a0 to chat with. I can ping across the link but the internet can surely not talk with me on a fe80:: address.

How do we get our subnet actually routing over these private addresses?

Interface routing on Edgerouter-X

I learned a new trick here, and I admittedly still don’t fully understand PtMP wired networks but here is how it works.

  1. Configure your subnet on the loopback interface.

     set interfaces loopback lo address '2001:0DB8::/56'
    
  2. Setup the IPv6 default route for pppoe0.

     set protocols static interface-route6 '::/0' next-hop-interface pppoe0
    

That is actually the entire setup from a routing perspective. It may be among some of the longest time I’ve spent trying to understand two lines of config.

Wire up your LAN

Now the internet knows where your router is inbound and your router knows where to send outbound traffic. Next you’ll actually want to tell your LAN clients about it.

Use router advertisement to further sub-divide the network by interface. Here we’ll configure a /64 for each internal LAN segment.

  1. Configure the router interface address.

     set interfaces switch switch0 vif 500 address 2001:0DB8:500::1/64
    
  2. Configure router-advertisements for LAN clients.

     edit interfaces switch switch0 vif 500 ipv6 router-advert
     set cur-hop-limit 64
     set link-mtu 0
     set managed-flag false
     set max-interval 600
     set name-server '2001:0DB8:500::1'
     set other-config-flag false
     set reachable-time 0
     set retrans-timer 0
     set send-advert true
    
  3. Commit and save the config

     commit
     save
    

Seeing it in action

With an interface assigned and routing configured you can see the full routing table in action after the config is reloaded.

swilson@edgerouter-x# run show ipv6 route
IPv6 Routing Table
Codes: K - kernel route, C - connected, S - static, R - RIP, O - OSPF,
    IA - OSPF inter area, E1 - OSPF external type 1,
    E2 - OSPF external type 2, N1 - OSPF NSSA external type 1,
    N2 - OSPF NSSA external type 2, B - BGP
Timers: Uptime

IP Route Table for VRF "default"
S      ::/0 [1/0] via ::, pppoe0, 00:11:30
C      ::1/128 via ::, lo, 02w4d15h
C      2001:0DB8::/56 via ::, lo, 02w2d06h
C      2001:0DB8:500::1/64 ::, switch0.500, 02w1d22h
C      fe80::/10 via ::, pppoe0, 02w2d14h
C      fe80::/64 via ::, ifb_pppoe0, 02w2d14h

And no where along this journey did you need to fight with DHCPv6-PD firewall issues, client arguments, or arcane version issues.

It was actually surprisingly easy in the end. Obviously you’ll still need to configure your own firewall policy for IPv6 which is pretty frustrating but a good zone-policy tool should make that a once off too.

Bonus points - IPv6 upgrades in AWS VPCs

One gotcha I encountered in this journey was relatively unexpected. While upgrading the existing legacy VPC I’d created years ago to support IPv6 EC2 instances I found the instance was able to get an IPv6 address but not actually reach remote hosts?

Was it security groups? Nope. Was it my own borked routing? Nope. This process continued for a little while before I remembered my old friend the IGW.

If you’re upgrading an old VPC to IPv6, don’t forget you’ll need to wire up a static ::/0 route to your IGW for IPv6 traffic to egress on!

Almost a year to the day after activating Mt Warrigal, I again sent my good friend Pascal VK2IHL an email saying “hey let’s go SOTA”. It seems we only get one good run at this a year!

A week later we were at the Kanangra Walls car park setting out for the summit of Mount Cloudmaker VK2/CT-015, an as yet unactivated 6 pointers in the NSW Blue Mountains.

Mount Cloudmaker in the distance

TLDR; We didn’t make it! An extreme VKFF parks activation yes but no SOTA summit. Maybe next year?

Challenges

When we initially set of we knew it was going to be hot and heavy going with a lot of elevation change. However, as these things tend to do a few circumstances conspired against us activating.

Brennan tops scramble

It wasn’t long until we found our first time sink for the day. I’m not entirely sure why but I had neglected to do any research on the specific route down from the Brennan Top to the Mount Cloudmaker track.

Long story short, as you drop down from the plateau just after the crevass is the scramble where it appears people are just dropping over the edge of the hill and the track appears to run out.

After a bit of overly cautious exploring with the handline, I found that this is indeed the way and actually the path is quite doable. In the end better to be safe then sorry when carrying a heavy SOTA pack but it did eat up 45 mins or so heading out.

Brennan tops scramble

Tree damage at Mount Berry

Continuing on the theme of delays, as we went we did encounter a few down trees from recent(ish) storm damage.

One of the crtical junctions though is the hop up onto the top path at Mount Berry. This was fairly obscured because a weighty gum had tumbled down the rocky gap.

On the topo maps the track leads east of the summit high point but as we found later I lead us way to far east.

I recommend avoiding our blue track and taking the summit route (green return track) next time unless you enjoy contouring on scree!

Mount Berry

Returning to Crafts Wall

While I am listing all the shameful navigational mistakes I might as well impart my last bit of wisdom for this neck of the woods.

On the way out before Mount Berry you might miss the little pagoda after Crafts Wall. As it turns out the track actually drops you down into the pass with this feature on your left.

But coming back tired and dehydrated I found the first big wall of rock and though “crafts wall, go along the right hand face”. Alas we again were contouring in steep, less than idilic bush.

In this case the track you want is our blue Saturday morning track. The green trip is an “adventure”.

But the cave at the base of the wall does make an absolutely knock out view and the cool smooth rock where many a bushwalker has sat previously to take a breather was very much appreciated!

Crafts walll return

Aborting the attempt

In the end I called it at the campsite between Roar Knoll and Rumble Knoll.

This was less than 500m from Mount Cloudmaker summit but with dying light at 16:30, ~300m of elevation and only a liter of water for the return journey it just wasn’t worth pushing on to risk something going wrong in the dark.

Water wise, the Ti Willa Gorge was reported dry the weekend prior. This made pushing over to 100 man cave fairly unappealing so we made a plan to return home as early as possible to avoid the heat of the day without looking for water in the field.

Activating Kanagra-Boyd National Park VKFF-0256

Once we had made camp and rested up a bit Pascal and I figured we’ve carried radio gear way too far to not use it!

I also figured activators may not get out to Kanangra very often so we strung out Pascal’s homebrew ZS6BKW antenna and setup my QMAC HF90. With the addition of a fixed LC tuner we had 80 meters booming in from Dural and it was time to call CQ!

In the log were;

VK3SQ
VK3PF
VK5LA
VK2IJS
VK5AYL
VK3ZPF
VK3MCK
VK3KYF
VK7ME
VK5WU
VK4CZ
VK5PL
VK3VEK
VK3FTHY

Thanks again to all the chasers for the company! Otherwise it was just the massive possums in the moonlight!

I’ll leave you with a Google Earth tour of our GPS track as we contemplate what things to shave off next year and how much extra water might be squeezed in!

73’s

Sam

Ahoy!

It’s been a while between blogs, but after a recent journey out activating SOTA summits with Pascal VK2IHL it’s time to share our tales!

Our plan was simple, after looking at sotamaps.org a few weeks prior we decided there was far too many un-activated summits in Kanangra-Boyd National Park.

So, we set out on a Friday afternoon for Dunphy’s campground and established camp a little before last light and just before the rain. Of course, I can’t think of more appropriate wheels to be getting there in than the land cruiser!

Land cruiser QRP05W

Planning

It was our first joint activation so I planned to take it easy initially and give us an option of aborting early if something wasn’t working. So the plan was something like this;

  • Dunhpys to Ironpot Ridge
  • Ironpot Ridge to VK2/CT-080
  • Activate
  • VK2/CT-080 to Cattle Dog Ridge
  • Cattle Dog Ridge to Mobbs Swamp
  • Camp at Mobbs
  • Mobbs to Mount Warrigal VK2/CT-057
  • Activate
  • Mount Warrigal to Dunphys via Medlow Gap

Easy, peasy! Only 25km!

After a bit more planning and close inspection of the Strava Global Heatmap I realised those that Cattle Dog Ridge was an inferior choice, clearly there was a known track up Black Horse Ridge instead. Better yet, we could add a contingency plan to just bush bashing off-track straight south from Ironmonger Hill by instead detouring to Coxs River and east along Breakfast Creek to before ascending Black Horse.

With some rough routes planned and on the maps we were off!

Day 1 - VK2/CT-080 and Black Horse Ridge

We were up early and walked out of Dunphys by 0630 after having a light rain early Friday night. It’s a nice day walk to VK2/CT-080, strangely a un-labeled, un-marked summit between the lower peaks of Ironmonger Hill and Ironpot Mountain along the ridge line. I’m always surprised how reluctant activators are to venture out to this little peak. It’s paltry four points might be it!

Never the less, it didn’t take us too long to make it up to the summit and get activating. I’d foolishly bought an untested antenna, a HyEndFed Ultralight 10-15-20-40 EFHW but neglected to bring the 10m of feedline needed and instead tried to use 1m. This appeared to result in some terrible conditions all around so we quickly moved back to the old faithful 20-30-40-80 linked dipole from SOTABeams. Also with conditions being marginal we stepped the 817 up to 30 watts via the P50M amplifier for our 80 meter contacts which were marginal in the NVIS paths.

We made our contacts quickly knowing that we had a long, long day of walking ahead of us.

22:42z	VK5CZ	7MHz	SSB	R41 S59
22:58z	VK3ANL	7MHz	SSB	R33 S54
23:00z	VK4SMA	7MHz	SSB	R55 S59
23:01z	VK4TJ	7MHz	SSB	R58 S59
23:09z	VK2HRX	3.5MHz	SSB	R33 S59
23:17z	VK2YW	3.5MHz	SSB	R57 S59
23:24z	VK2IO/M	3.5MHz	SSB	R36 S51

After a quick look over the cliff lines and drops around the ridge we quickly opted for our backup route down the spur to Coxs River. A brief rest, lunch and extra water picked up from the river before we turned east and started along the dry Breakfast creek bed. The only real highlight being an echidna trying to hide under a rock, a couple of startled beef stock and just towards the end two pig hunters on horse back maintaining the 1080 traps. Fortunately they told us a group of 8 had just come down the Black Horse Ridge track otherwise we may well have missed the track up out of the creek bed. So started Black Horse - boy what a hill! We climbed from 380 meters to 650 meters in 900 meters over a 90 minute effort. Personally I had the heavy pack with all the radio gear but Pascal was also lugging 4+ kilograms of water!

Needless to say, we established camp not much further along the ridge for the night having ticked off about 15.5Km of our journey.

Day 2 - Mobbs Swamp and Mount Warrigal VK2/CT-057

Day 1 burned more water than we liked and we quickly agreed the plan had to be visiting Mobbs Swamp for water at the spring before anything else otherwise abort back to the car. Sadly on arrival the only potentially spring fed water was well and truly black and wriggling.

Fortunately for us though, it had rained fairly solidly on Friday night filling a number of deep puddles around the spring in the rocks.

Filtering puddles of rain water at Mobbs Swamp

We managed to filter out a full three liters so it was time to take a crack at Mount Warrigal.

We ascended from the south western side with only 500 meters or so of scrub bashing from Mobbs up to the southern tip. The climbing up the hill was generally steeper than Black Horse with the extra fun of no established track what so ever. There was something marked on the map but we certainly never found it!

I had read some discussion talking about access via the south but there are some seriously vertical cliffs so we gave it a miss after a quick look. We continued around to the eastern face along Wombat Parade heading north-east. I had read Paul Ma’s notes on an ascent point further along marked by a particularly prominent tree. You’ll come across it near 4308 5228 and we quickly dumped our packs and took just the 817 and dipole up to the summit.

Inside the activation zone according

From the bottom looking up it’s not too bad really and we bounded up quickly. Once you’re up the climb, you’ll be disappointed to know the activation zone is still a bit of a walk north. Needless to say when I say the altimeter tick up to 935 meters it was more than close enough for me!

The path to the summit

On the summit we quickly threw the brickies line into a tree and hoisted the dipole again. First up was a summit-to-summit contact with VK3GRA/P on VK3/VC-019 before we got a spot out. We didn’t hang around too long with the long trek back to the car and it was to be for the best later.

01:07z	VK3GRA/P	7MHz	SSB	R49 S57 S2S
01:11z	VK3PF	7MHz	SSB	R54 S59
01:16z	VK2IO/P	7MHz	SSB	R43 S43 VKFF-1177
01:17z	VK4TJ	7MHz	SSB	R51 S56
01:19z	VK4CZ	7MHz	SSB	R52 S57
01:20z	VK3SQ	7MHz	SSB	R56 S57

SOTA flag flown on Mount Warrigal for the first time

Done and dusted, it was time to get back down to our packs and have some lunch before the long walk home.

If we could find where we came up! In our excitement we’d neglected to actually mark the ascent and honestly the climb / scramble didn’t feel that bad. Still, standing at the top of the cliffs looking down it was a different story!

I remembered a particularly prominent looking tree hollow and we eventually found a cain very near where our GPS tracks showed we had climbed up but it was one of those times you painfully learn some lessons

  1. Your GPS tracks are never frequent enough.
  2. If it’s dodgy, mark your ascent with tape or something else you can follow and remove on the way back down.
  3. Carry a handline! 10m is enough but 15m would be nice.
  4. Always have your PLB on you, not in your pack.

After we sat and mused for a bit and I ate a spare muesli bar I’d stuffed in a pant pocket for later I built up the courage to adventure down past the cain to see what looked familiar. It was further down than I thought before we saw the track we had taken up the hill. I definitely was glad to have the handline out on the way back down. The trip up seemed far easier in retrospect!

Setting up the handline for Pascal Easterly view from the handline back over Lake Burragorang

Nearly two and half hours later we finally had our packs back on and were setting out for home. The handline came in handy again later at the north eastern escarpment where the track drops over the edge of a few tall rocks. I promised Pascal these would be the last big rocks and we continued out to the fire trail making it there around 14:30.

No lifts to be had at the fire trail sadly

We arrived back to Dunphys campground at 16:45 finding the land cruiser left abandoned by all other campers. Only the kangaroos to keep it company. No sooner had we come to a stop and the sky opened up again. We decided our timing was impeccable and wrote it up to a perfect end of a long, but very successful trip.

If your interested in the track log you can find that over at Ozultimate.

Next up, either Mount Cloudmaker VK2/CT-015 or Mount Cookem VK2/CT-102 then on to a long slog through the tangle of summits around Yerranderie.

Sadly VK2/CT-100 is firmly in the exclusion zone around Lake Burragorang along with VK2/IL-010 and VK2/IL-011. Fortunately we don’t need to figure out how to carry in enough water to get there and back!

73’s

Sam

Ahoy!

After working QRP only for a few months I opted to drop the purist aspect on that front. After talking with some locals and reading VK2QR’s write up with interest I took the plunge and ordered a MX-P50M fresh from ebay.

Being somewhat under prepared for AusPost to deliver before Easter I was surprised to have the amplifier delivered with perfect timing. I quickly asked around and was lent a 60W dummy load and an Avair AV-601 from Tony VK2KZ. Now armed with the required test equipment to not burn out my poor Z817 tuner I started soldering up the power poles and control lead. For the FT-817ND control lead I used the pinout schematics again from VK2QR. In case hosting related things go awry in future I’ve extracted the pinout diagram here.

FT-817ND CAT CABLE SCHEMATIC

Testing Setup

While its far from completely scientific, these results are a step in the right direction. While I can’t validate the unit I have particularly there is a incredibly detailed write up by GM4SLV on the amplifiers RF performance. If you’ve made it this far and are waiting for “YES BUT LOOK IMD” go read Johns write up, I am not covering that.

The details I was looking for however have more to do with my choice of power. Unlike most SOTA activators carrying Lithium battery packs up the hills I’ve been using a Goal Zero Sherpa 100 (ok its still Lithium). But the little box includes a 12v regulator fused for 10A along with a 5V USB feed and support for Solar, DC or AC charging. Its a neat package but needs a bit of consideration, on the other hand it doesn’t look like a bomb and has high wife approval factor for camping related power needs so its a win-win / least bad choice!

Here is some fabulous 1 minute ASCII art of the test environment.

          +------------------+  +----------+  +-----+
RF        |                  |  |          |  |     |
          |                  |  |          |  |     |
          +                  +  +          +  +     +
          FT-817ND          MX-P50M       AV-601    60W Load
          +                    +
          |                    |
DC        | +------------------+
          | |
          | |
          + +
          WARS Power Pole Dist
          +
          |
          |
          +
          In-line DC meter
          +
          |
          +
          Goal Zero

Or for the visually inclined here is a photo while testing 40M at 5W input RF.

40M TX test at 5W

Initially I was powering the rigs using a bigger, heavier Goal Zero unit (Yeti 150) which was AC connected. I only clicked as I almost completed the testing that this was not going to replicate SOTA conditions. So you see data for both a mostly stable 13.8v power supply as well as a second table where I switched to testing with the Sherpa 100 on internal battery.

The difference between the two power supplies is mostly that the Yeti 150 is NIMH SLAB type with ~150Wh while the Sherpa 100 is a LiPo pack and 98Wh.

Needless to say I only recorded detailed voltage supply for the battery powered test.

Testing Data

Yeti 150 + AC charging

Band Frequency Mode In RF watts Out RF watts In Amps
10 28.85 PKT 0.5 7 4.26
15 21.225 PKT 0.5 9 3.85
20 14.175 PKT 0.5 8 3.8
40 7.15 PKT 0.5 8.5 3.9
80 3.6 PKT 0.5 8 3.95
           
10 28.85 PKT 1 15 5.75
15 21.225 PKT 1 18 5.2
20 14.175 PKT 1 17 5.2
40 7.15 PKT 1 18 5.4
80 3.6 PKT 1 17 5.4
           
10 28.85 PKT 2.5 26 7.52
15 21.225 PKT 2.5 29 6.38
20 14.175 PKT 2.5 26 6.4
40 7.15 PKT 2.5 26 6.6
80 3.6 PKT 2.5 29 6.7
           
10 28.85 PKT 5 35 8.6
15 21.225 PKT 5 35 7.2
20 14.175 PKT 5 30 7.3
40 7.15 PKT 5 30 7.3
80 3.6 PKT 5 39 7.6

Sherpa 100 Internal Battery

Band Frequency Mode In RF watts Out RF watts In Amps TX voltage RX voltage
10 28.85 PKT 0.5 7 4.29 11.16 12.09
15 21.225 PKT 0.5 9 3.86 11.16 12.06
20 14.175 PKT 0.5 8 3.83 11.15 12.03
40 7.15 PKT 0.5 9 4 11.13 12.02
80 3.6 PKT 0.5 8 3.98 11.14  
               
10 28.85 PKT 1 15 5.7 10.92 12.03
15 21.225 PKT 1 17 5.08 11.03 12.02
20 14.175 PKT 1 16 5.07 11.02 12.03
40 7.15 PKT 1 17 5.29 10.99 12.03
80 3.6 PKT 1 17 5.37 10.95 12.03
               
10 28.85 PKT 2.5 25 7.05 10.66 12.03
15 21.225 PKT 2.5 26 6.14 10.78 12.03
20 14.175 PKT 2.5 24 6.17 10.78 12.03
40 7.15 PKT 2.5 25 6.26 10.76 12.03
80 3.6 PKT 2.5 27 6.45 10.82 12.03
               
10 28.85 PKT 5 30 7.94 10.54 12.09
15 21.225 PKT 5 30 6.91 10.82 12.09
20 14.175 PKT 5 30 7 10.81 12.09
40 7.15 PKT 5 30 7 10.79 12.04
80 3.6 PKT 5 31 7.22 10.73 12.04

On Air

So I set off this morning to entertain the inner Sydney morning dog walkers by taking my new SOTA pack off to Blackwattle Bay to get some clear space for the inverted-V. The goal was to test a few things;

  1. At JMFD 2017 we had great success using this antenna with VK2KZ’s digital station and tuner across most bands. I hadn’t thought of this before so wanted to see what the LDG Z817 would tune to
  2. Test the amplifier and get on-air signal reports
  3. Let the blue smoke out before I find myself on top of a hill doing it live.

Here is the setup for the morning.

Antenna upright at Blackwattle bay 
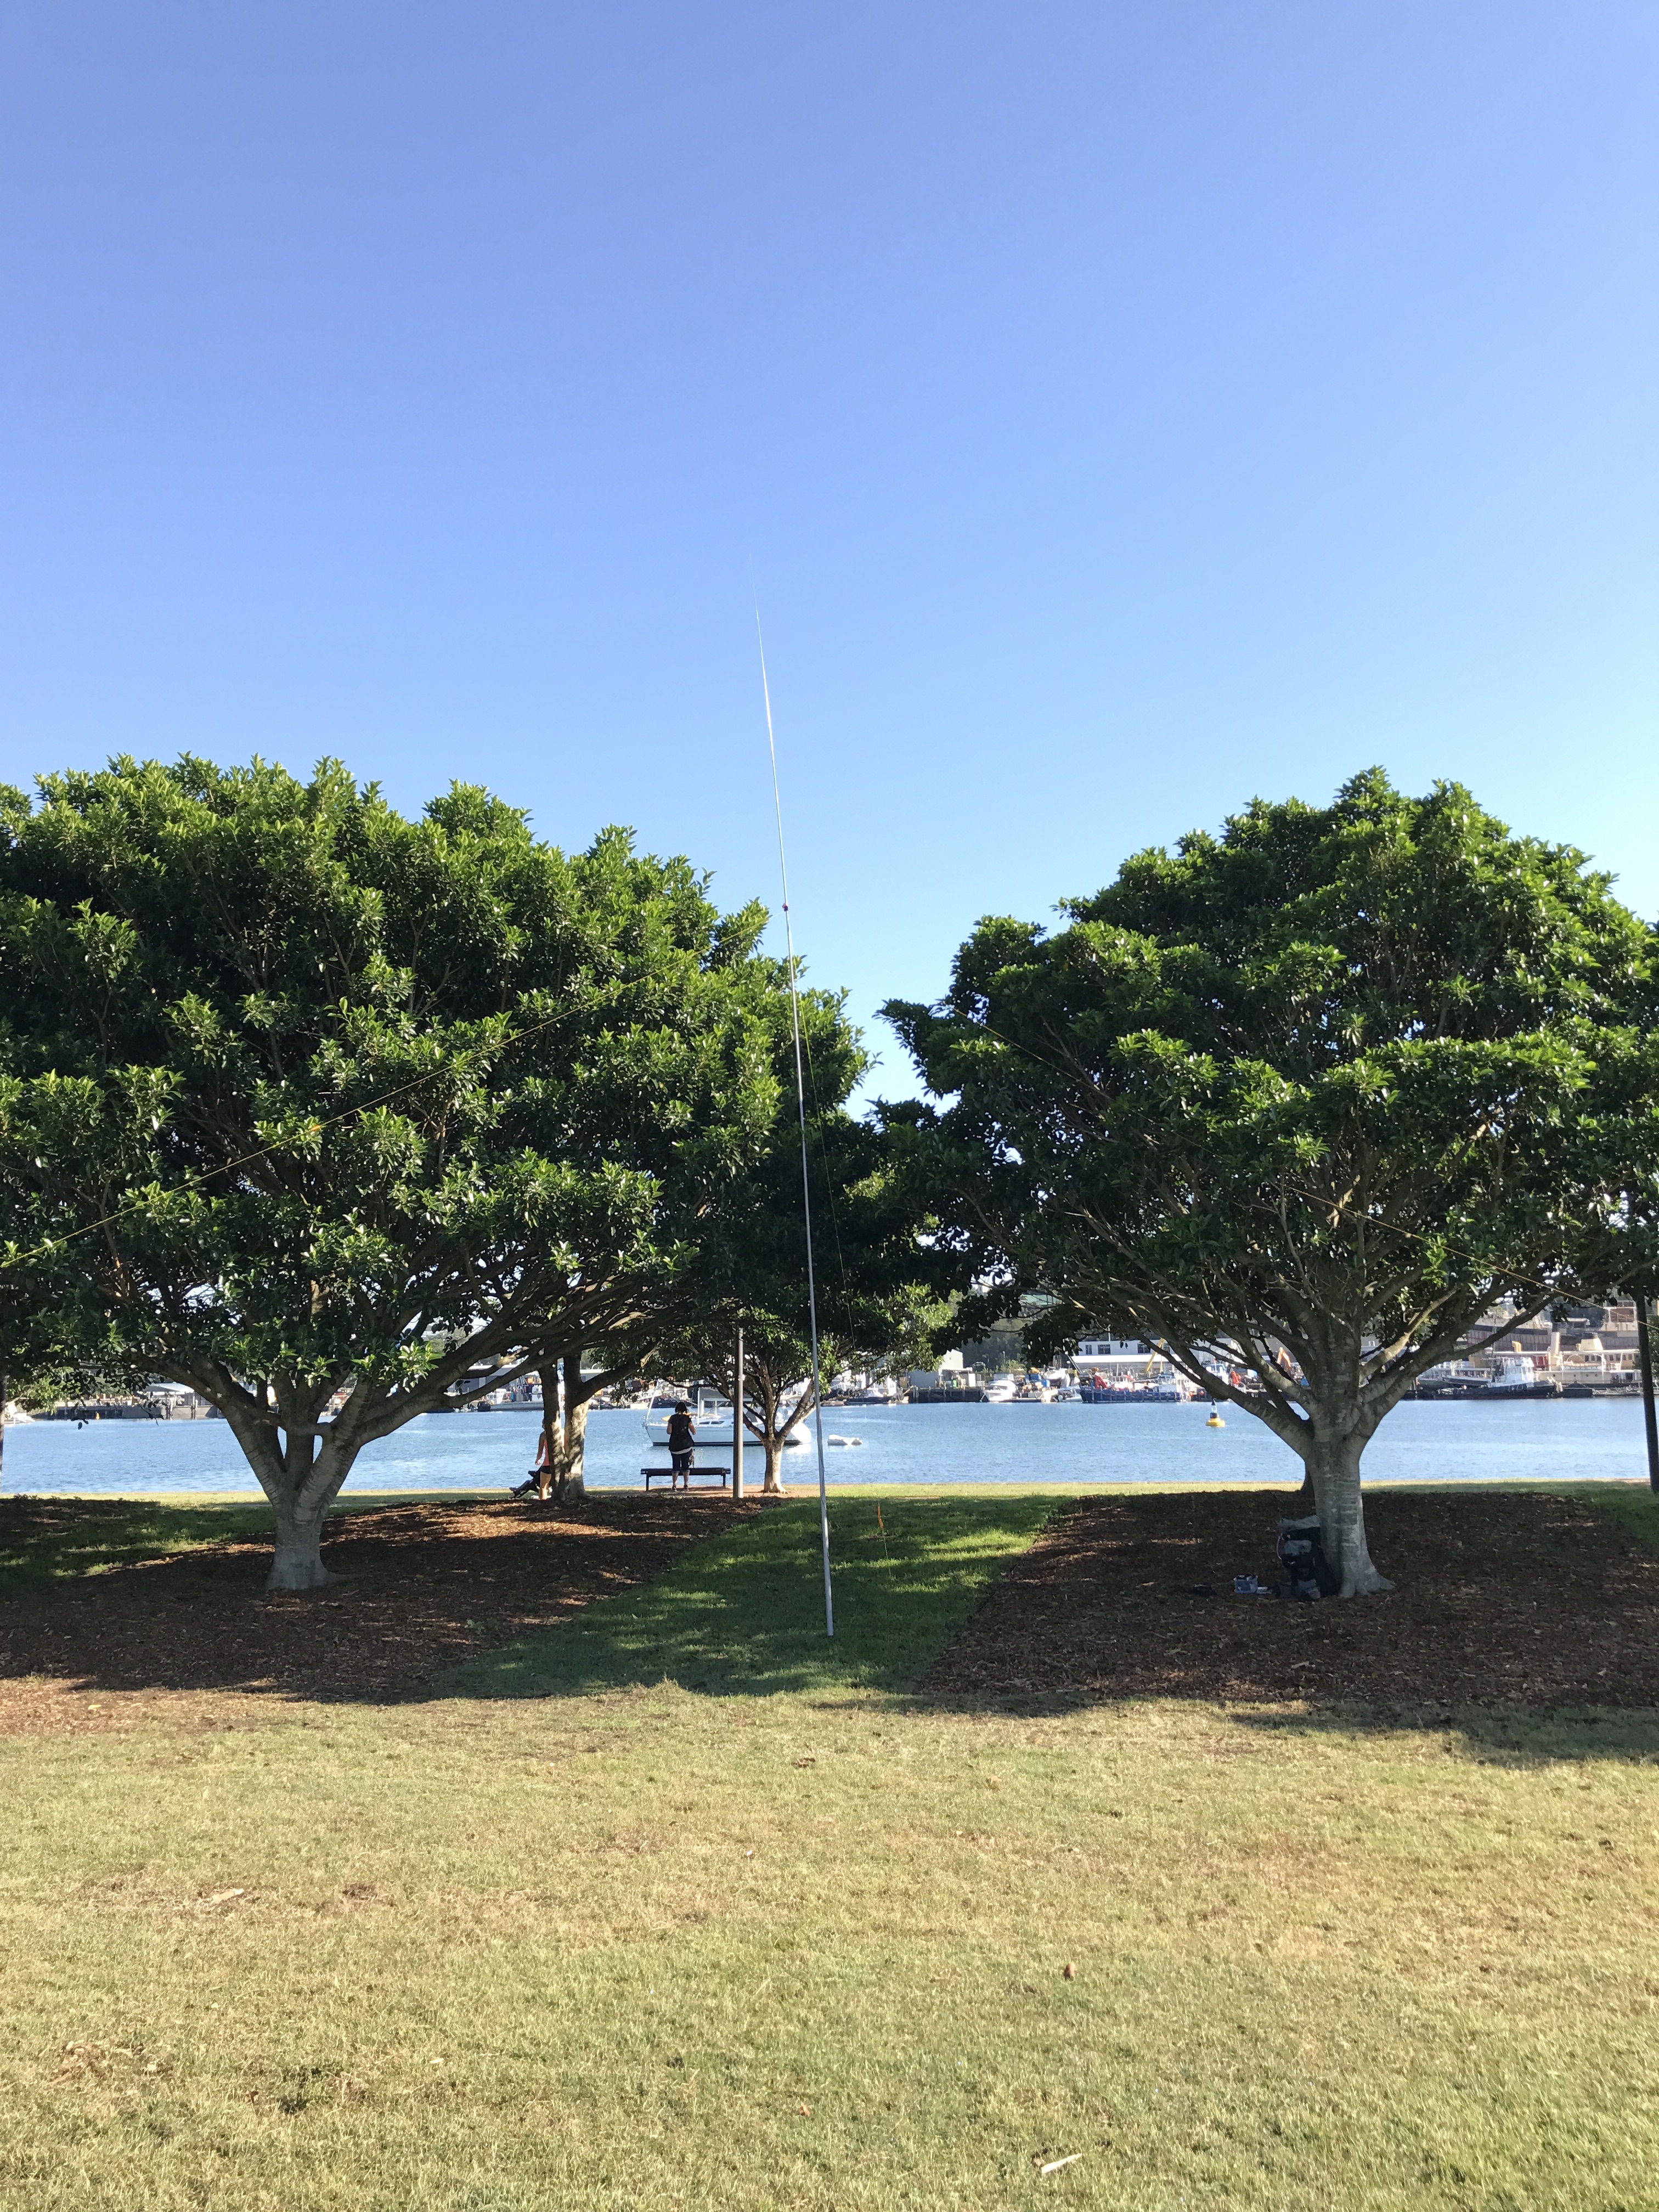
Note: SOTABeams squid pole and 40/20 linked dipole in inverted-V.

Station equipment on the air 
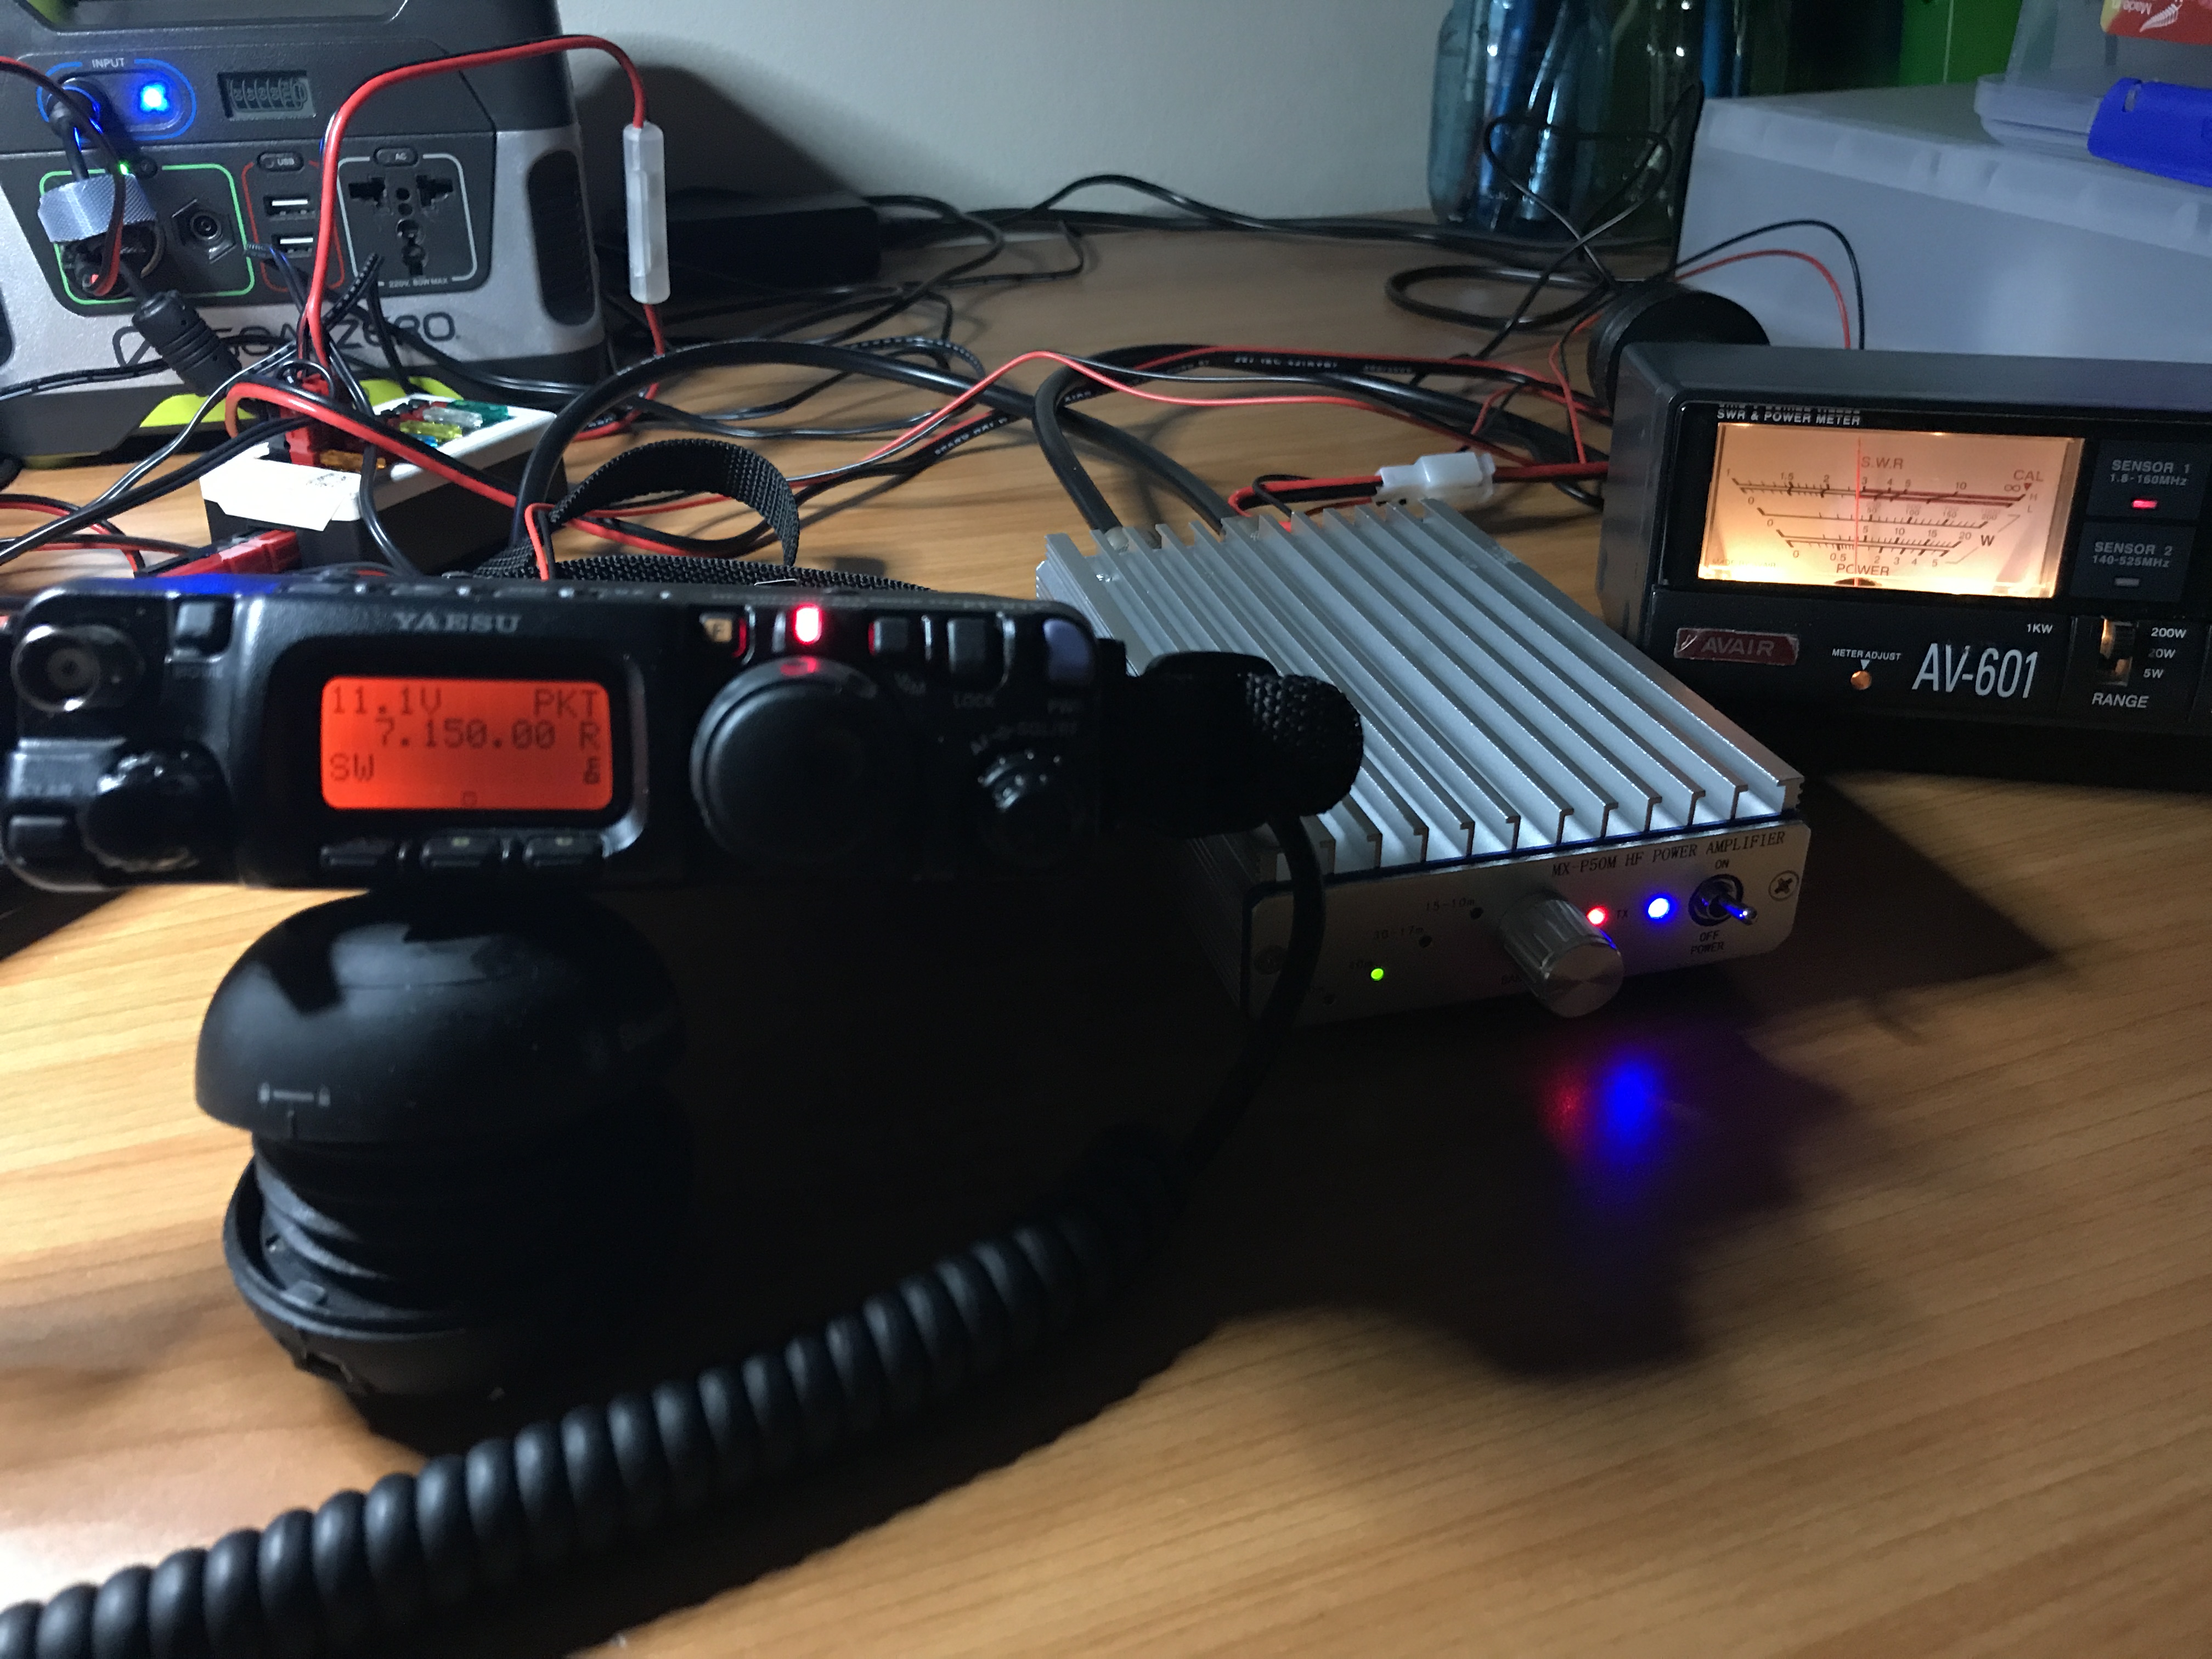
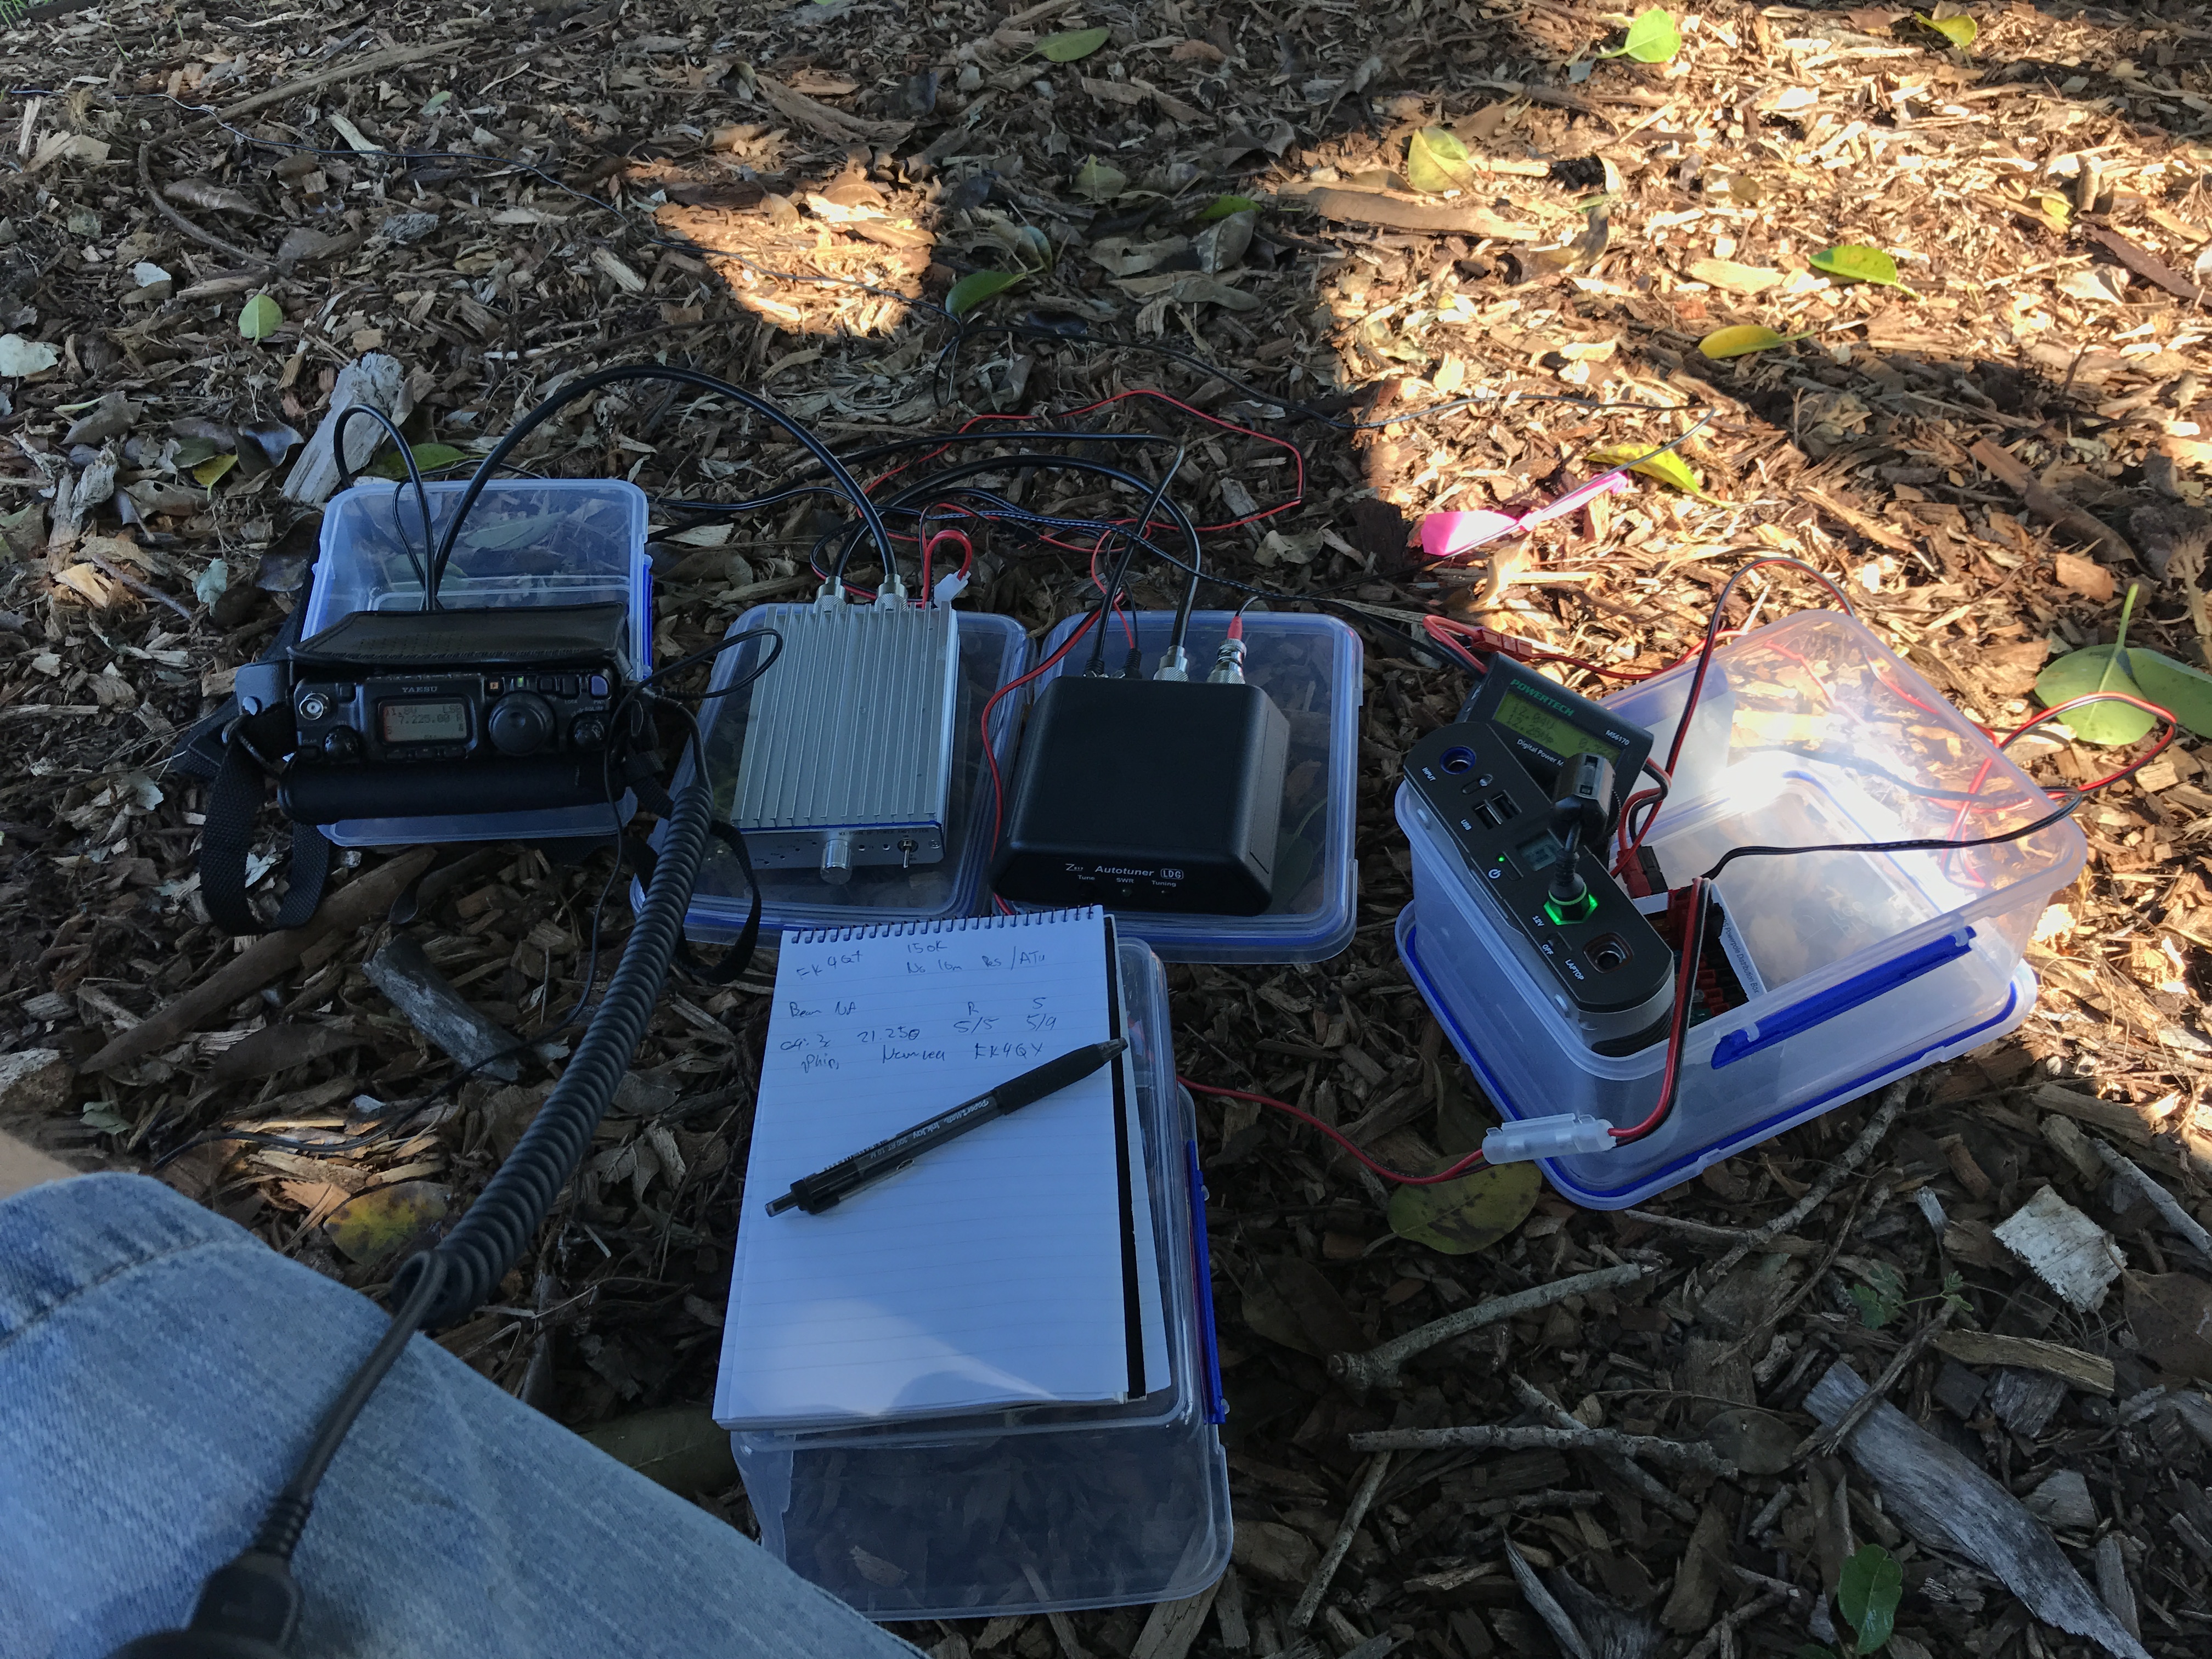
Note: Left to right - FT-817ND, MX-P50M amplifier, LDG Z817, In-line DC meter, WARS Power Pole Kit, Sherpa 100.

For those that miss my scrawl in the log, just prior to this photo I made a contact with FK4QX on 15 meters at ~20w after I answered a CQ DX call. There was some initial difficulty with Philippe’s beam pointing to NA rather than VK but with a 5/5 report I was happy with that.

In fairness - this morning propagation on the higher bands did seem more forgiving. Andrew VK1AD/P wrote up his SOTA activation with a NA contact at 5w on 17m.

Never the less the little MX-P50M has made a welcome addition to the SOTA pack while the longer term options of learning CW and upgrading to an Advanced license take a bit more time!

Ahoy!

Good news everyone! I passed my exam and as of earlier this year joined the ranks of radio amateurs around the world. It has been a fun few months exploring all manner of things.

Using the WIN System with a cheap Baofeng GT-3 MK II handheld during my trip to Austin where I spoke at Art Into Science. I was astounded by the density of repeaters in the US compared to our sparse coverage in VK.

handheld radio with towers in background 
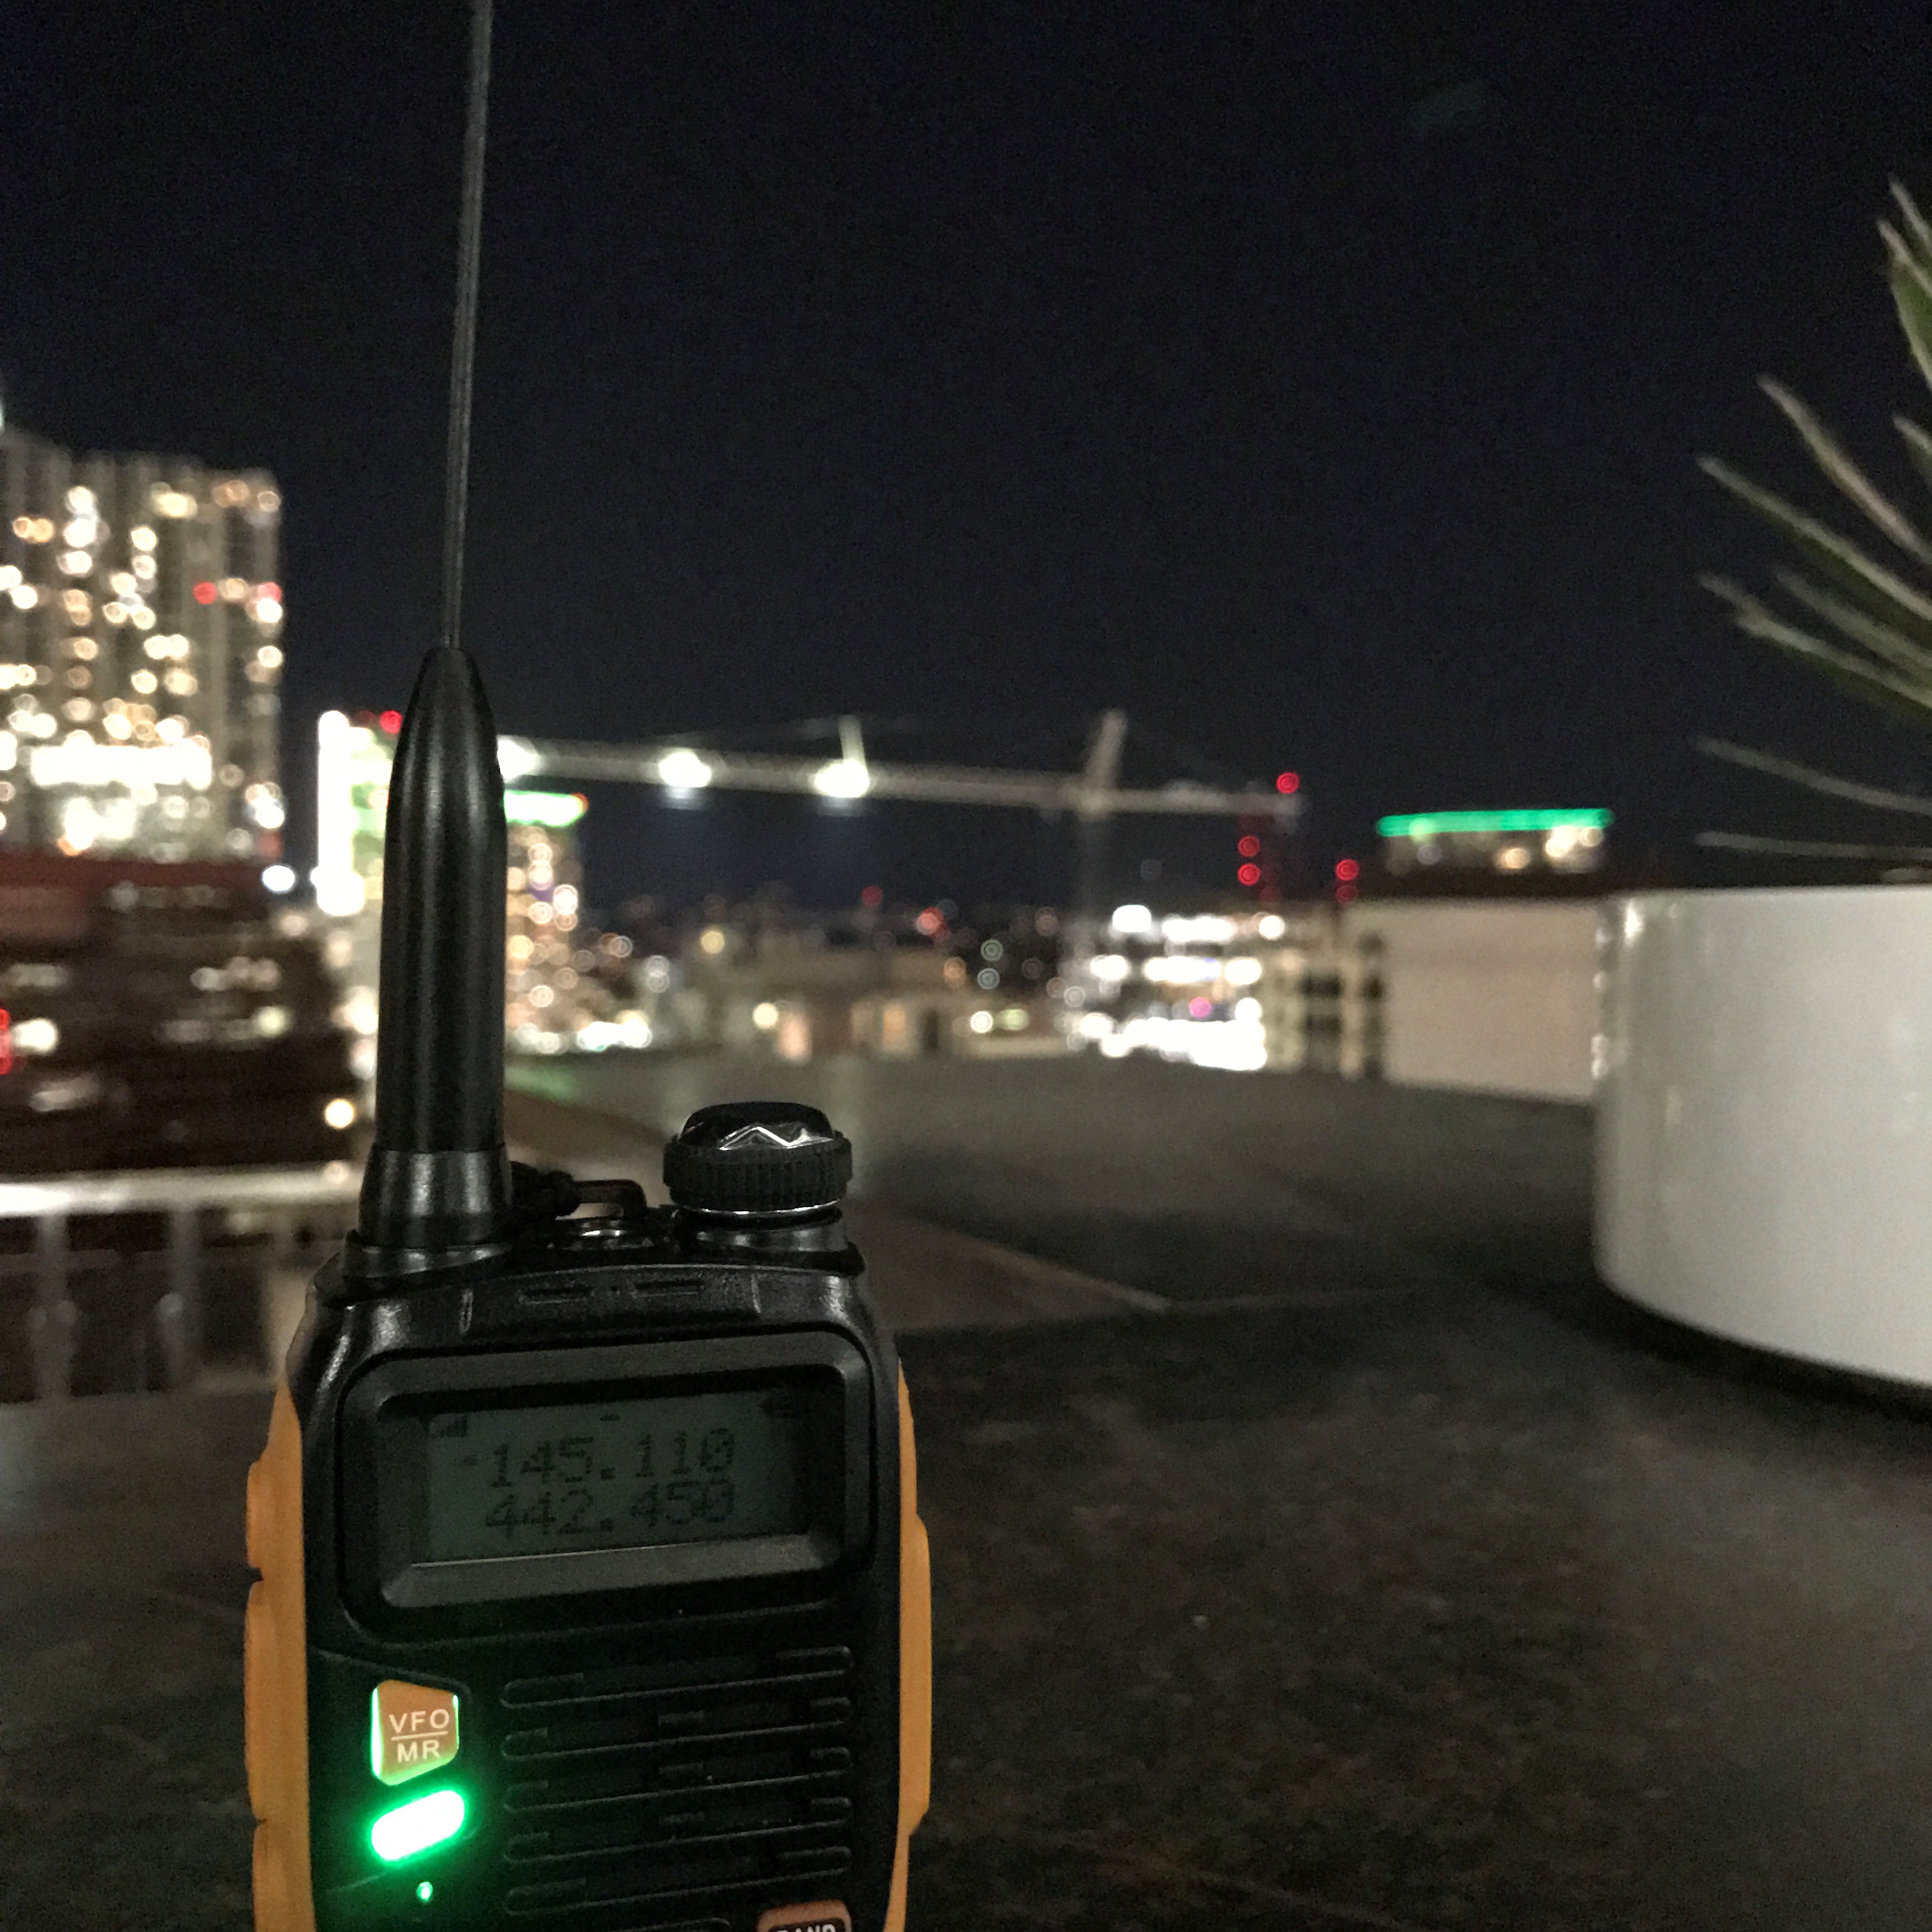
Taken looking west from the Colorado Tower in downtown Austin. The tower lights in the distance mark the AUSWST APRS repeater.

I’ve been building myself up to do Summits On The Air (SOTA) style activations as my main HF radio outlet since getting things working in inner Sydney would require herculean efforts. Here you can see where I stood up my squid pole and linked dipole to test everything and was making contacts into VK3 on 40 meters successfully despite it being nearly noon!

park bench with antenna and solar panels 
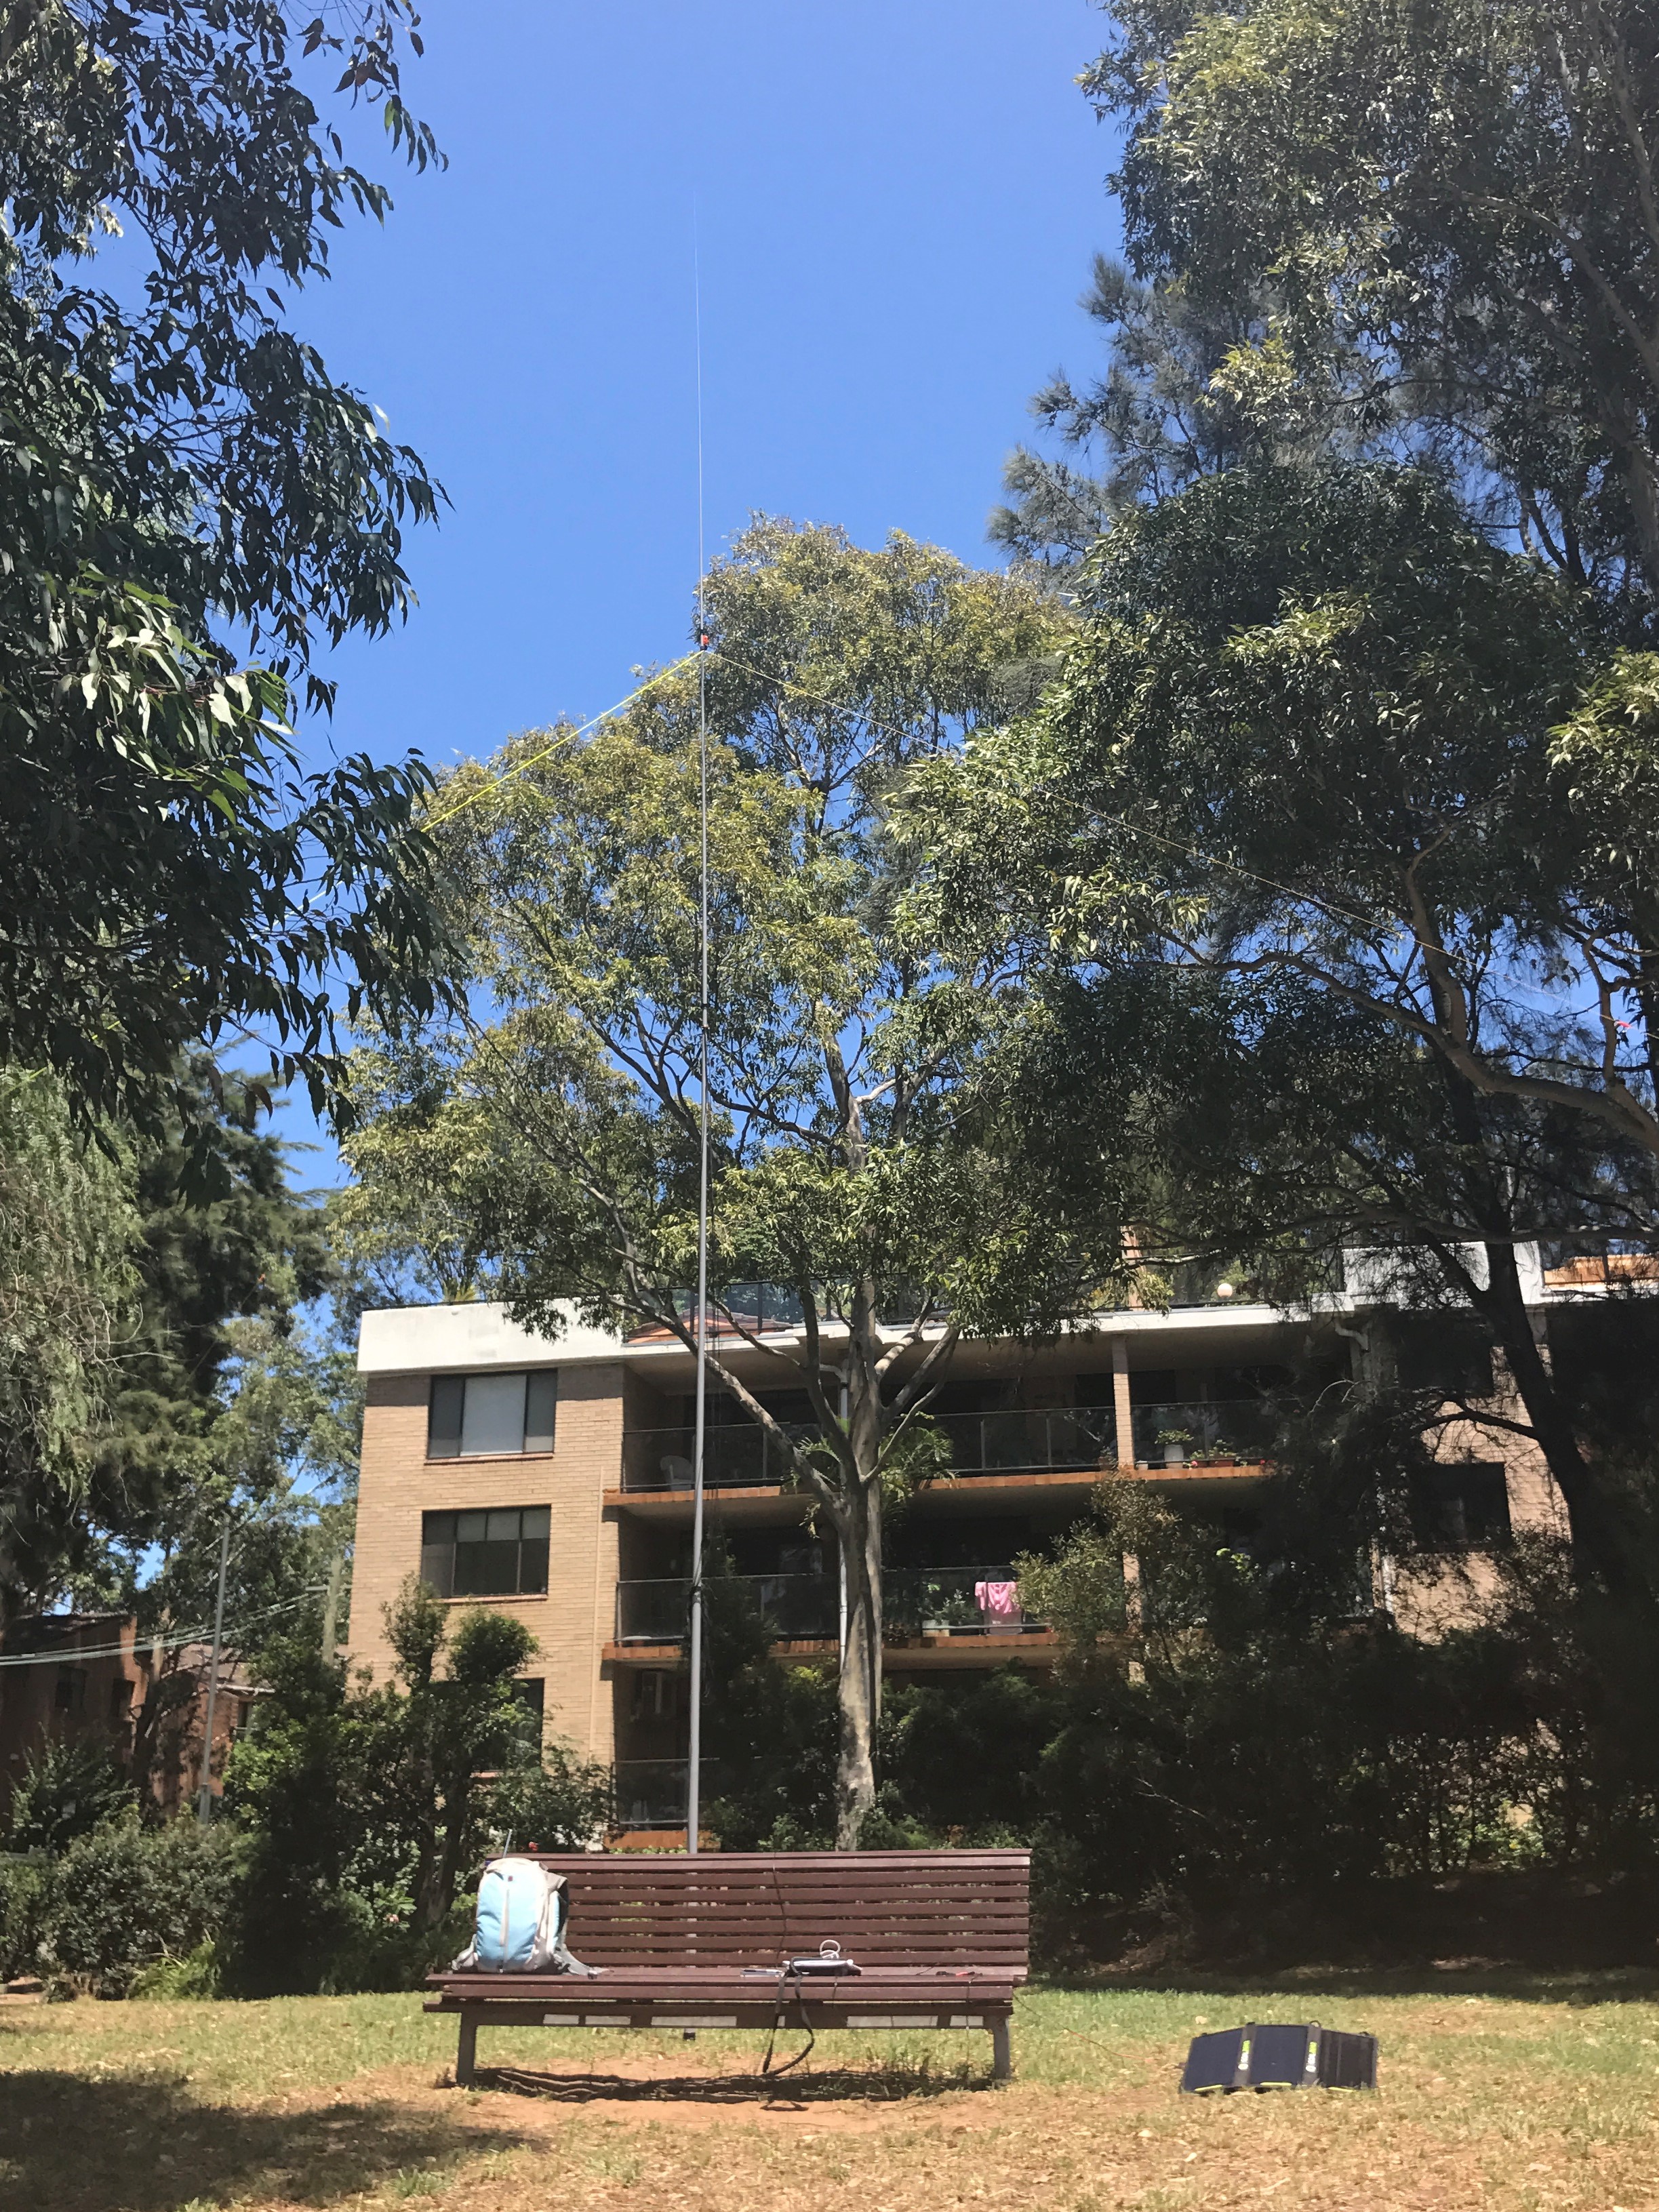
A shot of my park bench overlooking Black Wattle Bay. I opt’ed to lug everything I had planned for a SOTA activation much to the amusement of on-lookers.

I achieved my first SOTA activation for a grand total of one point recently by activating VK2/HU-094 Mount Yakaba. With only the FT-817 when 40 meters started fading it was time to pack up. Fortunately I just scraped in with the required four contacts! The view from the summit while only a few hundred meters was well worth the heat.